


 Read more...
What is the Honeypot Token?
A 🍯 Honeypot Token is a type of custom-designed cryptocurrency token that behaves normally on the surface — but with a twist: once users purchase it, they’re unable to sell or transfer it out of their wallet. Meanwhile, the original deployer or a designated address can still sell or move tokens freely.
In other words, a honeypot token is structured to attract buyers with the usual promise of trading activity, tokenomics, or early opportunity — but under the hood, the smart contract contains logic that prevents others from selling or transferring tokens, depending on specific conditions coded into it.
Learn more about 🍯 Honeypot Token by reading our Blog articles.
In the FAQ section you will find answers to most questions on the topic of Honeypot in crypto. If you did not find the answer, ask your question on the Contact page in any of the suggested ways.
What makes Honeypot Token so profitable for rug pull?
A Honeypot Token offers a very unique profit structure for its creator because of how it’s engineered. It can be highly rewarding 💰 in the context of rapid-launch token projects, such us rug pull, especially when it comes to liquidity and token control:
1. One-Way Flow of Value
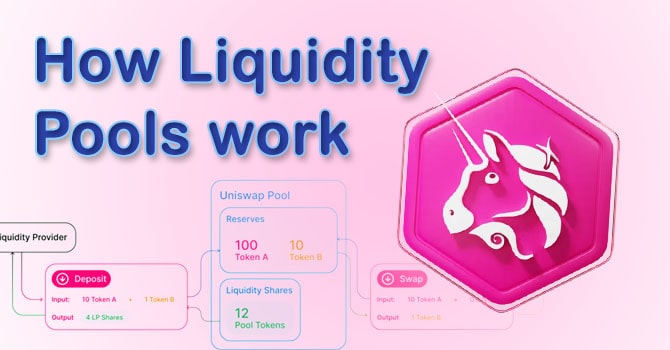
Once the honeypot token is deployed and paired with a native coin like BNB, ETH or SOL in a decentralized liquidity pool (e.g., on PancakeSwap, Uniswap or Raydium), the setup allows anyone to buy in, but only the deployer or a whitelisted address can sell out.
- Every buy action pushes up the price due to automated market maker (AMM) logic.
- Since buyers can’t sell, none of that liquidity leaves — it just accumulates.
- This creates the illusion of strong price momentum and “diamond hands", which often draws in even more interest.
2. 100% Liquidity Capture
In a traditional token scenario, a portion of liquidity is used for trading, but also constantly leaves the pool as people sell. In a honeypot, that never happens — all the incoming base token (like BNB) stays locked in the pool until the deployer decides to withdraw by removing liquidity or selling their own tokens.
This results in a 100% value capture model — all buy-side liquidity becomes available to the token creator.
3. Price Chart Shows Only Green Candles
Because nobody can sell the token except the designated address, the trading chart typically shows a steady rise in price, with no red candles or drops. This tends to:
- Attract bots or users looking for “moonshots”
- Give a psychological edge: “Everyone’s buying, nobody’s selling”
This draws in more volume, especially from automatic bots that look for early price pumps.
4. Psychology-Driven Engagement
When buyers see constant upward price action and strong volume, it triggers FOMO (fear of missing out) — especially in fast-paced ecosystems like ![]() BNB Smart Chain or
BNB Smart Chain or ![]() Solana
Solana
- New wallets jump in quickly.
- Buying pressure increases exponentially.
- The deployer can harvest at peak momentum — often just minutes or hours after launch.
5. Smart Contract Gives Total Control
Because honeypot logic is coded into the smart contract, the deployer controls: who can sell, when liquidity can be pulled, whether trading fees or taxes apply, which bots or wallets are blocked.
This gives the creator the tools to optimize for maximum exit value, without interference from other participants.
How does Honeypot Token works?
A 🍯 Honeypot Token is a special kind of cryptocurrency that looks and behaves like any other token — you can easily buy it, see it listed on a decentralized exchange like ![]() PancakeSwap or
PancakeSwap or ![]() Uniswap, and watch its price move. But there's a catch: while buying works normally, selling is restricted for everyone except the creator or a specific wallet. This makes the token appear active and growing, when in fact, only one party has full control over the flow of funds.
Uniswap, and watch its price move. But there's a catch: while buying works normally, selling is restricted for everyone except the creator or a specific wallet. This makes the token appear active and growing, when in fact, only one party has full control over the flow of funds.
What makes it work is how the token's smart contract is written. It includes logic that quietly blocks selling attempts from regular users, even though the interface and trading platforms suggest everything is functioning as usual. When someone tries to sell, the transaction fails, often without a clear explanation — and because it doesn’t raise alarms or show obvious warnings, many people don’t realize what’s happening until it’s too late.
This structure can be extremely profitable for the creator. As more people buy in and the price appears to rise (since nobody is selling), the contract continues to collect more native tokens like BNB or ETH into its liquidity pool. At any time, the creator can withdraw this value or sell their own tokens freely, capturing all of the incoming funds. The result is a system that channels all the buy-side activity into a single exit point — which the creator controls entirely.
How to create a Honeypot Token?
Creating a 🍯 Honeypot Token starts with getting your hands on the right source code — this is the core of your setup. There’s no one-size-fits-all honeypot template, so choosing the proper code depends on which blockchain you’re using (like ![]() Ethereum,
Ethereum, ![]() BNB Smart Chain, or
BNB Smart Chain, or ![]() Solana) and what features you want, such as trading limits, taxes, or whitelisting. The source code defines how your token behaves — including the hidden logic that limits selling while keeping buying open — so selecting a tested and reliable honeypot package is your real entry point (it can be done here → Products )
Solana) and what features you want, such as trading limits, taxes, or whitelisting. The source code defines how your token behaves — including the hidden logic that limits selling while keeping buying open — so selecting a tested and reliable honeypot package is your real entry point (it can be done here → Products )
Once you have the code, the process is pretty straightforward. First, you’ll need a ![]() Metamask wallet funded with the native coin of your chosen blockchain. For Ethereum, that’s ETH; for BNB Smart Chain, it’s BNB; and for Base, you’ll need Base ETH. These funds cover the cost of deploying your token to the blockchain.
Metamask wallet funded with the native coin of your chosen blockchain. For Ethereum, that’s ETH; for BNB Smart Chain, it’s BNB; and for Base, you’ll need Base ETH. These funds cover the cost of deploying your token to the blockchain.
Next, you’ll head over to Remix IDE, an online platform that lets you create, customize, and deploy smart contracts directly to EVM-compatible networks. Here, you’ll paste in your honeypot code, configure basic settings like token name, symbol, and total supply, and possibly tweak other features like wallet limits or trading fees depending on what your contract supports. Then you hit “Deploy” — and your token is now live on the blockchain.
The final step is to Add liquidity to a decentralized exchange (DEX) like ![]() PancakeSwap or
PancakeSwap or ![]() Uniswap. This means pairing your honeypot token with a well-known currency like ETH, BNB, or USDT, so people can start trading it. The moment you do this, your token becomes publicly tradable — or more accurately, buyable. Thanks to the smart contract logic, others can buy your token, but only your wallet retains the ability to sell or move it out.
Uniswap. This means pairing your honeypot token with a well-known currency like ETH, BNB, or USDT, so people can start trading it. The moment you do this, your token becomes publicly tradable — or more accurately, buyable. Thanks to the smart contract logic, others can buy your token, but only your wallet retains the ability to sell or move it out.
Of course, each honeypot build may come with its own nuances — but don’t worry, we’ve outlined everything clearly in our Guides📙 so even total beginners can follow along. Once deployed, you’ve got a fully functional honeypot token: tradeable, visible on DEXs, and entirely under your control.
How to make Solana Honeypot Token?
Creating a Honeypot Token on  Solana is a whole different game compared to Ethereum, BNB Smart Chain, Base, or other EVM-compatible blockchains. That’s because Solana doesn't use Solidity or smart contracts in the same way — it runs on its own system, with its own logic and tools. So if you’re coming from the EVM world, forget about deploying a Solidity contract. Those classic honeypot tricks simply won’t work here. But don’t worry — we’ve got you covered.
Thanks to tools like Solana Honeypot Pro, it’s absolutely possible to launch a honeypot token on Solana — and it’s even simpler than you might expect. We broke down the full process in our Tutorial on YouTube ![]() , but here’s a quick overview of how it works:
, but here’s a quick overview of how it works:
First, you create a regular Solana token — and you can do this using no-code websites for token generation, Solana CLI, or whatever you like to use. The important part? Do not revoke the  Freeze Authority during token creation. That’s your golden key to controlling token behavior later on.
Next, you add liquidity to ![]() Raydium, the leading DEX on Solana. This is what makes your token tradable, so users can start buying it. Pair it with SOL or USDC, and your memecoin becomes active on the market.
Raydium, the leading DEX on Solana. This is what makes your token tradable, so users can start buying it. Pair it with SOL or USDC, and your memecoin becomes active on the market.
Finally, you run the Solana Honeypot PRO script and connect it to your token. This script uses Solana’s native token management features to automatically block selling while allowing new buyers to keep coming in. And just like that, your regular memecoin transforms into a honeypot token — one that anyone can buy, but only you control.
No Solidity, no Remix, no EVM — but still a full-function 🍯 honeypot tailored to Solana’s ecosystem.
How to choose the Honeypot contract code?
Choosing the right Honeypot contract code is one of the most important decisions you'll make in the setup process.
Not all honeypot tokens are built the same, and the right code depends on two key factors: the blockchain you're deploying on, and the kind of features you want your token to have.
The first thing to consider is the Network. Honeypot tokens made for Ethereum or other EVM-compatible chains (like
![]() BNB Smart Chain,
BNB Smart Chain,
![]() Base, or
Base, or
![]() Arbitrum) use smart contracts written in Solidity, following the ERC-20 or BEP-20 token standards. For these networks, you’ll want to choose from the 🍯 Honeypot Token V6 to V1 series — each version offers a different mix of behavior and control.
Arbitrum) use smart contracts written in Solidity, following the ERC-20 or BEP-20 token standards. For these networks, you’ll want to choose from the 🍯 Honeypot Token V6 to V1 series — each version offers a different mix of behavior and control.
For example, if you’re launching on ![]() BNB Smart Chain and targeting
BNB Smart Chain and targeting ![]() PancakeSwap specifically, the BSC Honeypot Token is fine-tuned for that environment and offers smooth compatibility out of the box.
PancakeSwap specifically, the BSC Honeypot Token is fine-tuned for that environment and offers smooth compatibility out of the box.
But if you're working on Solana, the rules change entirely. Solana doesn’t use Solidity or follow EVM logic, so you’ll need a completely different approach. In this case, the Solana Honeypot Pro script is your go-to solution. It’s designed to handle Solana’s token architecture and lets you set up a buy-only token with full control, even without deploying traditional smart contracts.
Once you've chosen your network, the next step is to decide what kind of functionality you need. Do you want a basic setup that simply blocks selling? Or do you need more advanced features — like being able to withdraw locked liquidity, renounce ownership but still keep hidden control, or run a time-based unlock? Each version of the honeypot contract offers different features, so it’s about finding the right balance between simplicity, power, and stealth.
For example, if you’re just starting out and want a plug-and-play setup with bare minimum of features, 🍯 Honeypot Token V2 offers a clean and effective way to block sales. If you want something more advanced — say, the ability to rug even after locking liquidity — 🍯 Honeypot Token V6 is more suited to that strategy.
Pick your blockchain first, then match the functionality you need with the right version of the honeypot code. We’ve designed each option with specific use cases in mind, so whether you're launching — there's a perfect 🍯 Honeypot setup ready for you.
How to buy the Honeypot Token source code?
Once you've chosen the honeypot token code that fits your project — or even if you're still unsure and need help deciding — the next step is simple: just reach out to us via the ![]() Contact Us page. Whether you have questions, need a recommendation, or want to compare different packages, our team is here to walk you through everything. It’s a personalized, no-pressure conversation where you can get all the information you need to make the right choice.
Contact Us page. Whether you have questions, need a recommendation, or want to compare different packages, our team is here to walk you through everything. It’s a personalized, no-pressure conversation where you can get all the information you need to make the right choice.
Once you're confident and ready to proceed, we’ll arrange the transaction. You can choose your preferred payment method — we support major blockchains like Ethereum, BNB Smart Chain, Tron, and Solana, so it’s easy and flexible. After the payment is confirmed, the honeypot token code you ordered will be delivered to you immediately, either through the same chat or directly to your email — whatever works best for you.
It’s fast⚡ , clear, and designed to make sure you’re supported at every step — from choosing the right version to launching your honeypot token successfully.
Where do i find ERC-20/BEP-20 Honeypot Token code?
To find ERC-20/BEP-20 honeypot token code, the best place to start is right on our website — we offer a full lineup of tested and battle-ready honeypot contracts built on the ERC-20/BEP-20 standard.
It’s important to know that ERC-20 and BEP-20 are fully cross-compatible when it comes to creating honeypot tokens and meme coins. That means if you purchase an ERC-20 honeypot contract, you can deploy it not only on
![]() Ethereum, but also on other EVM-compatible networks like
Ethereum, but also on other EVM-compatible networks like
![]() BNB Smart Chain,
BNB Smart Chain,
![]() Base,
Base,
![]() Arbitrum,
Arbitrum,
![]() Polygon,
and more. The same contract structure works across these chains, so you’re not limited to a single network.
Polygon,
and more. The same contract structure works across these chains, so you’re not limited to a single network.
On our platform, you’ll find the full series of 🍯 Honeypot Token V1 through V6 — each version offering different features and levels of control depending on your strategy. Whether you’re looking for a beginner-friendly setup or a more advanced configuration that includes things like liquidity withdrawal or post-renounce control, there’s a version tailored to your needs.
We also offer a special BSC Honeypot Token, built specifically for ![]() BNB Smart Chain and optimized for DEXs like PancakeSwap. It’s ideal if you're targeting fast-paced meme launches on BSC with maximum compatibility and control.
BNB Smart Chain and optimized for DEXs like PancakeSwap. It’s ideal if you're targeting fast-paced meme launches on BSC with maximum compatibility and control.
So whether you're planning a launch on Ethereum, BNB Smart Chain, or any other EVM network, you can browse and choose the right honeypot package directly from our ERC-20/BEP-20 product section.
How to make profit from Honeypot crypto?
Making profit from a honeypot crypto token comes down to one key factor: how many buyers you’re able to attract. The honeypot setup gives you a major advantage — it allows you to collect all the incoming value without the usual selling pressure from traders. But here’s the catch: the contract alone won’t make magic happen. To actually generate profit, you need to combine your honeypot with strong marketing, liquidity investment, and solid token presentation.
Think of the honeypot as a powerful engine — but it still needs fuel and direction. That means preparing well in advance with things like social media accounts, a catchy token name and logo, listings on blockchain explorers and trackers, and hype-building campaigns in crypto communities. The more attention your token gets, the more wallets will start buying it — and that’s where the real profit begins.
If you launch your honeypot with zero marketing and low liquidity, you might catch a few bots or random buys, but nothing close to the potential it has. On the other hand, when you combine the honeypot mechanism with targeted exposure, Telegram hype, maybe some stealth launch vibes or meme culture — you create the perfect storm for buyers to pour in, and you keep full control over the value flow.
🍯 Honeypot Tokens are a high-leverage tool💰. When paired with preparation, creativity, and consistency, they can turn a simple meme coin launch into a much more profitable and efficient experience.
Who might be interested in making a Honeypot Token?
A 🍯 Honeypot Token can attract a wide range of people — from those who want to profit by launching meme coins to those who simply want to learn how smart contracts and DeFi mechanics work.
Thanks to the variety of honeypot packages available — each with different features and pricing — there's something for every skill level and budget. Beginners can start with simple versions to experiment and test, while more advanced users can unlock powerful controls like stealth ownership, anti-bot filters, and post-renounce tools.
That said, for the best results, it helps to have a basic understanding of crypto marketing and a willingness to put effort into building hype. Honeypots don’t generate profit just by existing — the real potential is unlocked when they’re paired with good branding, social presence, and smart liquidity moves.
While you can start experimenting with budgets around $500, a more optimal launch — with proper liquidity, strong visuals, and promotional reach — often takes $3,000 to $5,000. Think of it not as a cost, but as an investment into your token’s visibility and momentum.
The more you put into the setup and community building, the more powerful 🚀 the Honeypot Model becomes
How much does Honeypot script cost?
The cost of a honeypot script depends on the level of functionality you’re looking for. Simply put — the more advanced the features, the more control you get over your token’s behavior, and naturally, the price reflects that.
At the entry level, you can get started with 🍯 Honeypot Token V2 for just $75. It’s a great pick for beginners who want to explore the honeypot concept or test a basic launch with minimal setup. Despite being simple, it still does what matters most — it blocks selling ✅ while allowing buying, giving you control over the token flow.
On the higher end, there’s 🍯 Honeypot Token V6 priced at $385. This version is loaded with advanced tools — perfect for serious meme coin launches or more complex token strategies on Ethereum, BNB Smart Chain, Base, and other EVM networks.
If you're looking to build on Solana, the go-to choice is Solana Honeypot Pro, which is priced at $395. It's tailored specifically for Solana’s non-EVM architecture and comes with all the features needed to create a smooth, buy-only token experience in that ecosystem.
So whether you’re experimenting, learning, or aiming for a high-ROI launch, there’s a honeypot package available to match your goals and budget.